Adding custom permission using bloks
Lesson 3 Chapter 2
EOS CAFÈ BLOCK has made bloks really simple and convenient to use, you can use it for multiple wallets, which makes this whole process rather simple. Worth noting is that not all wallets allow the use of custom permissions, but it works great with i.ex. scatter.
To add a custom permission, you will need to sign the transaction with either active or owner key. In which case it's strongly recommended to use active key, always.
Let's add a custom permission key
1) Navigate to Wallet > Keys and Permissions
2) Go to Advanced, as shown in picture below
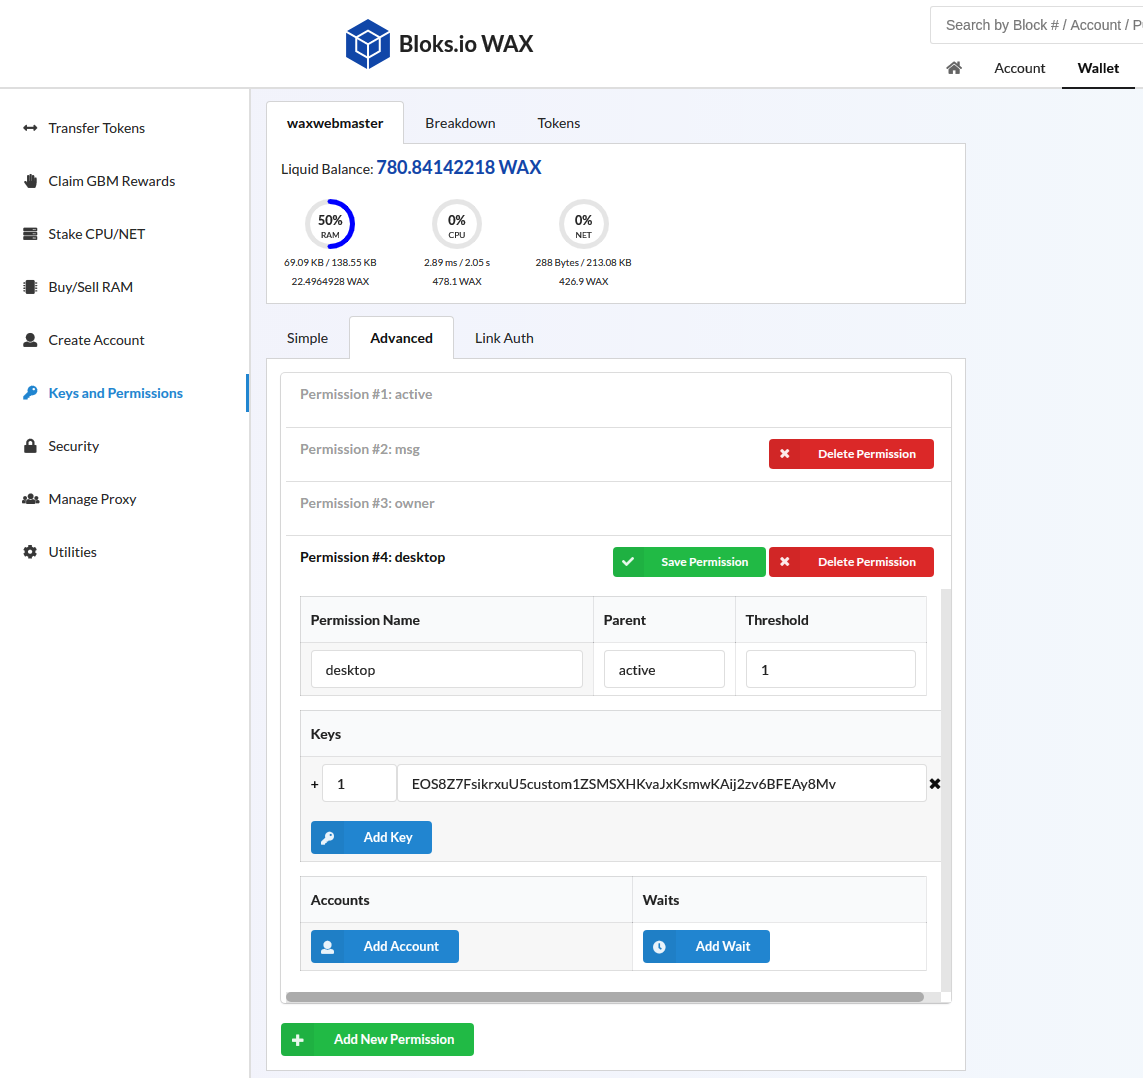
3) Add name of your custom permission, this can be anything in lowercase letters.
I used "desktop" as I intend to add this key to my desktop, and add the authentications to the contracts I intend to interact with from that device.
4) Parent, make this 'active' which is the parent permission.
5) Leave Threshold as 1
6) Add a public key in the Keys section. (How to generate key on previous chapter)
7) Hit 'Save Permission', and sign the transaction
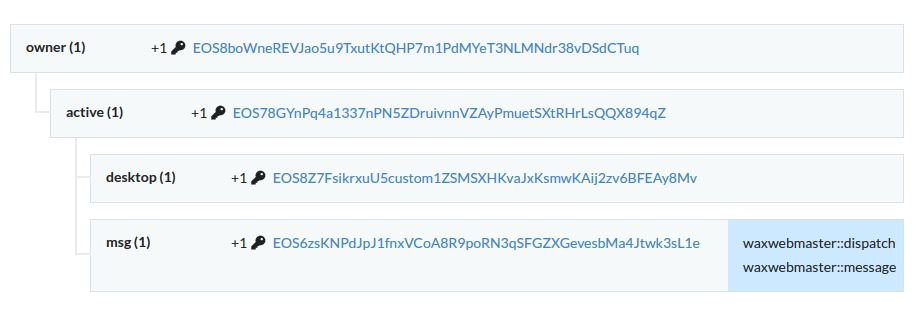
You can see that we have successfully added the desktop permission, and that I already had the 'msg' permission from before.
Let's link this permission to the intended authentication
'Auth' is the action you want your key to be authorized to perform. On WAX it makes a lot of sense to add the vote and claim permissions to a custom key, so you don't need to use your active key for everyday use. So let's do that.
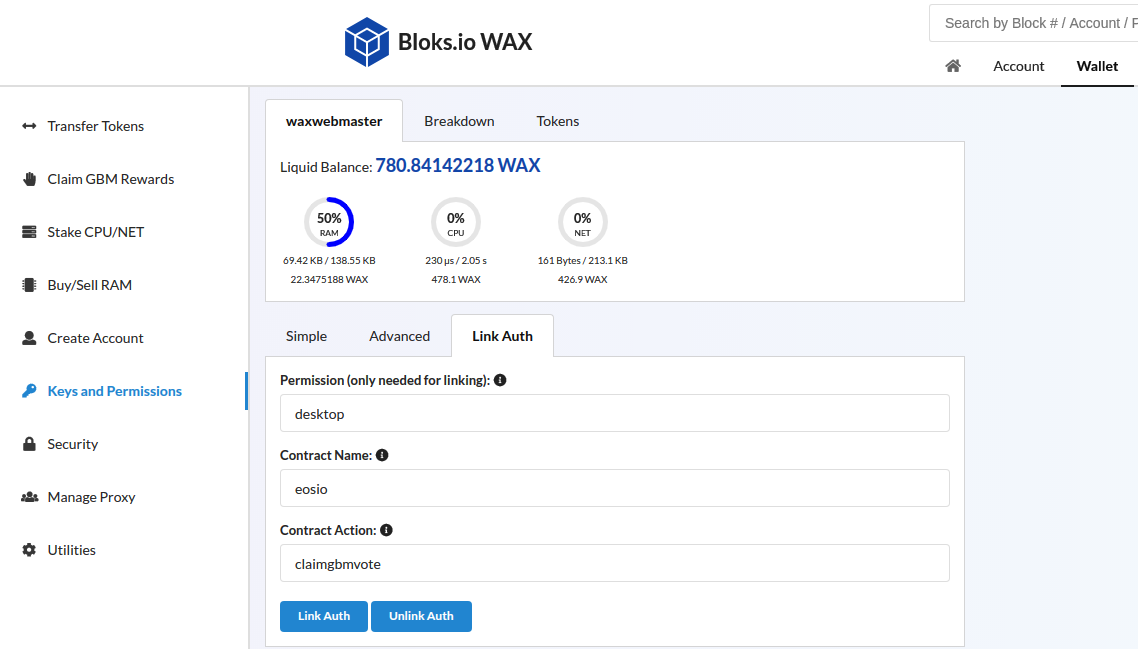
1) Navigate to 'Link
Auth', which is located under Wallet > Keys and Permission
2) In Permission, add the name of the custom
permission you added 'desktop'
3) Add 'eosio' in contract name
4) Add 'voteproducer' in contract action
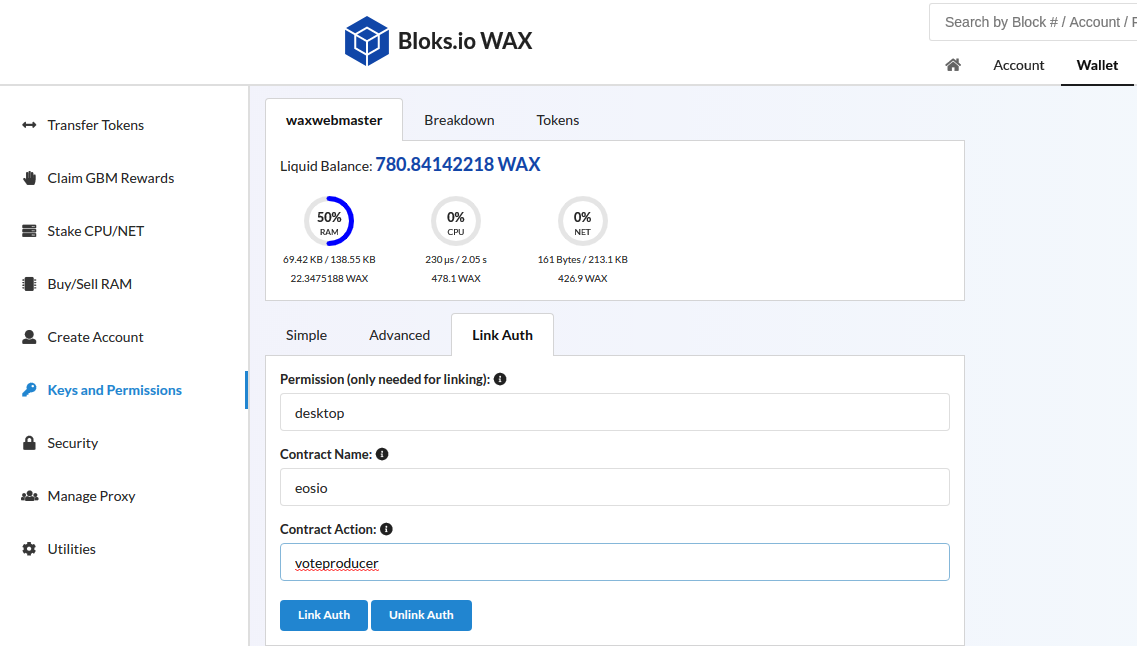
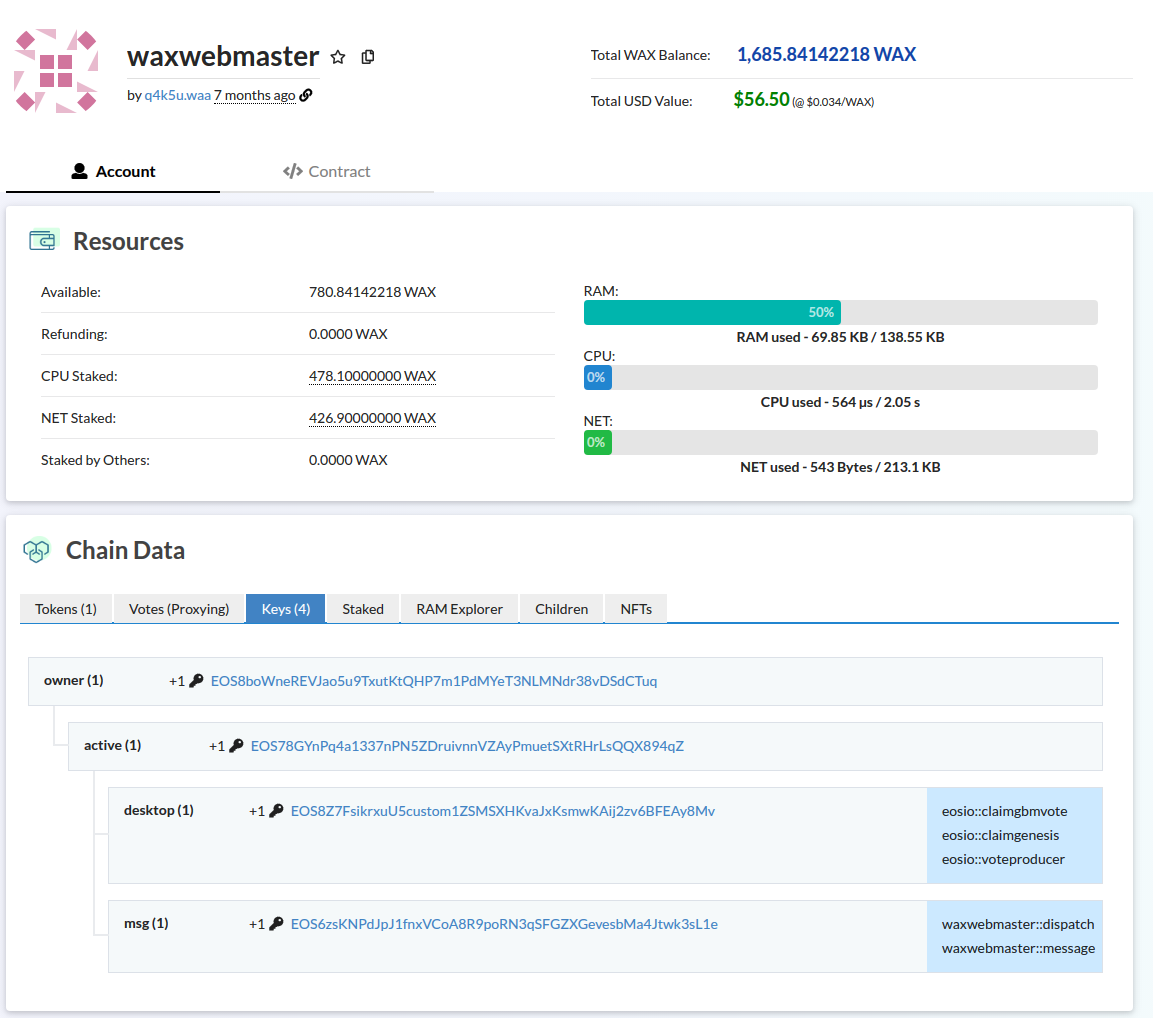
If you signed the transaction and did everything correct, under your account and keys, you should find the following

Add claim authentication
- claimgbmvote - Vote rewards
- claimgenesis - GBM rewards
1) Navigate to 'Link Auth', which is located under Wallet > Keys and Permission
2) In Permission, add desktop
3) Add 'eosio' in contract name
4) Add 'claimgbmvote' in contract action
Then redo same steps, but add claimgenesis as Contract action.
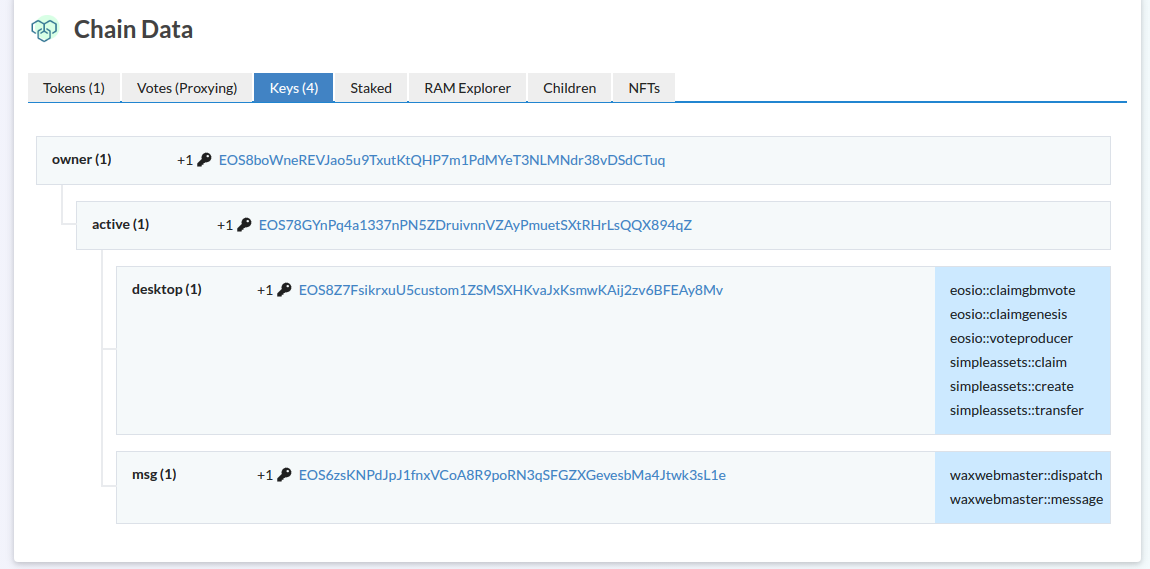
If you have followed the stops, you can now navigate to your account and click keys. You should find a 'desktop' key with the 3 auths we just did.
You can add authentication to any smart contract on chain, in the screenshot below you can see a few examples of how to add simpleassets to allow creation, claiming and transferring NFT's with the key. And please if you add transfer NFT, make sure you have a secure key, or anyone that gets your key can transfer all your NFTs.
This is only added as an example, and not as a recommendation. But rather add that to a different permission.
